Hello,
Well, I don't really have much to report right now other than some more car woes. The Daddy-Man finally got fed up with the general "We don't really know what we're doing, so let's try this" attitude over at Sears Automotive and did a bit of Googling for a reputable local repair shop.
I am happy to report that we have found Walt Eger's Service Center in Severn, MD. However, I am not happy to report that they've found an additional $700-$1900 worth of stuff to fix. See, if it's just replacing a radiator hose and replacing the air conditioner fan, it'll only be $700-ish. Add on two different system flushes and that brings it up to $1000. If it's the air compressor in addition to the $700 treatment plan and $300 flushes, it'll be $1900 total. That brings our grand total up to $3000 - Sears and Walt Eger's. Ugh ugh ugh.
We've committed to repairing.
Let's hear it for reducing, reusing, and recycling.
Yay?
Tuesday, August 31, 2010
Sunday, August 29, 2010
Wall Pretties TUTORIAL!
Hello All,
Sorry for the mini-hiatus. I've been distressed and depressed because of my earlier epic failure with the Halloween dress tutorial and we've been having difficulty getting our car all sorted out. Suffice it to say, we've spent $1,000 in one week on it and there's still something wrong. However, if I got started on the whole car fiasco, I wouldn't get to what I really want to show you today - and that's this:

Aren't they pretty? I was trolling around on one of my favorite websites, One Pretty Thing, and I saw some amazing wallflowers created entirely out of scrapbook paper, hot glue, a bit of cardboard, and a touch of ribbon over at Blue Cricket Design. Yup. That's all there is to these. Want to give it a go?
Material:
15 coordinating sheets of scrapbooking paper, size 12"x12" - really, you could get away with 8 because I ended up just using half of each sheet to make a total of 7 flowers, but I wanted variety of papers and they were on sale ;) AND a 12"x12" sheet of yellow for the flower center
cardboard - I used a cereal box and a deli meat box (that only housed the bag of deli meat - turkey, to be precise)
hot glue and hot glue gun
some ribbon - doesn't have to be much as it is only to make a loop on the back from which to hang the pretties
scissors
To begin, I got rid of the bit of un-pretty paper that sometimes lines the bottoms of the 12"x12" papers. Then, I folded them in half and used my countertop to rip them in half. Just lay the fold flush against the straight edge of your counter with one half up top and the other dangling. Grab that dangling piece and pull/rip it from the top half. If you've never done this before, I suggest you practice first. Or, you could use scissors if you'd like.
Then, you'll have something like this:

Now, get out something circular the size you want as the piece you'll be gluing the petals to (like a dinner plate or mixing bowl or a Slurpee cup) and trace it onto your cardboard. Cut out this circle. If you care what the back (that's going to be on your wall) will look like, go ahead and trace another circle the same size out of some cardstock and glue it down. Personally, I didn't care so I didn't do this. Make a little loop out of some ribbon and glue it down to the back of the cardboard so you can hang them on the wall later.

Now, you're going to cut out petals. And some more petals. And more. And more. And more. You get where this is going, don't you?
For the biggest of my flowers, I initially cut two petals each from every paper because I had two large flowers to make. After a bit of experimenting, I can tell you that you should probably only try to cut through two sheets at a time unless you don't mind touching up the edges later. The outer perimeter of petals should be roughly the length of the cardboard center.
After you have cut your petals, you've got two options. #1: Glue them directly to the cardboard. OR #2: Do a bit of folding and gluing and then stick them on the cardboard. If you go with #1, you will save yourself a lot of time but your petals will be all floppy. If you go with #2, this will take longer but your petals will have dimension. I like #2 better, but the couple times I experimented with #1, it didn't destroy my project. Also, #1 worked best when it was a very little flower.
If you're going with #1, skip this next part and go straight to gluing the petals down. If you're going with #2, read on.
So, #2-ers, take your petals and make a small fold on both sides at the bottom of the petal. If you look at the picture above this, you'll see how I folded the sides in just a little. Now, glue them down. Do this for all of your petals.
Cradle the petals in between your index finger and thumb and give them a bit of a squeeze. This will give them a bit of shape. Now lay them out around your cardboard circle and decide where you want them to go and then.....glue them down! Go around and around in concentric circles until you're at the center.

Take out that special sheet of yellow paper and cut out a circle big enough to cover the center of the flower and the folds in the petals. Fold that circle into 8ths and then unfold it. Put a dab of hot glue in the center on the back and glue it down. Cut out another circle that's smaller than the original center circle and fold that into 4ths. Pinch the sides of the circle while folded in half and bring those pinches together. This is like folding it into 8ths, but there won't be any crisp folds. Put a dap of glue on the center on the back and glue it down onto the center of the previous yellow circle.

I used several petal variations in this project. In the smallest of the flowers, the petals are heart shaped and are of the #1 (non folded and glued) variety. The second large flower has two points per petal and there are three center circles (the largest of the 3 center circles was cut into a sunburst shape). The three medium flowers are all different: one has finger-like petals, one has rounded tip petals, and the third has petals like a pansy. The possibilities are endless.
I hope you give this a try. It's time consuming, but very easy. My total cost for this project came out to about $5 (less if you consider I only used half of each sheet of paper) and you can't beat that with a stick, as my friend Katie is fond of saying. Send me pictures if you try it!

Sorry for the mini-hiatus. I've been distressed and depressed because of my earlier epic failure with the Halloween dress tutorial and we've been having difficulty getting our car all sorted out. Suffice it to say, we've spent $1,000 in one week on it and there's still something wrong. However, if I got started on the whole car fiasco, I wouldn't get to what I really want to show you today - and that's this:

Aren't they pretty? I was trolling around on one of my favorite websites, One Pretty Thing, and I saw some amazing wallflowers created entirely out of scrapbook paper, hot glue, a bit of cardboard, and a touch of ribbon over at Blue Cricket Design. Yup. That's all there is to these. Want to give it a go?
Material:
15 coordinating sheets of scrapbooking paper, size 12"x12" - really, you could get away with 8 because I ended up just using half of each sheet to make a total of 7 flowers, but I wanted variety of papers and they were on sale ;) AND a 12"x12" sheet of yellow for the flower center
cardboard - I used a cereal box and a deli meat box (that only housed the bag of deli meat - turkey, to be precise)
hot glue and hot glue gun
some ribbon - doesn't have to be much as it is only to make a loop on the back from which to hang the pretties
scissors
To begin, I got rid of the bit of un-pretty paper that sometimes lines the bottoms of the 12"x12" papers. Then, I folded them in half and used my countertop to rip them in half. Just lay the fold flush against the straight edge of your counter with one half up top and the other dangling. Grab that dangling piece and pull/rip it from the top half. If you've never done this before, I suggest you practice first. Or, you could use scissors if you'd like.
Then, you'll have something like this:

Now, get out something circular the size you want as the piece you'll be gluing the petals to (like a dinner plate or mixing bowl or a Slurpee cup) and trace it onto your cardboard. Cut out this circle. If you care what the back (that's going to be on your wall) will look like, go ahead and trace another circle the same size out of some cardstock and glue it down. Personally, I didn't care so I didn't do this. Make a little loop out of some ribbon and glue it down to the back of the cardboard so you can hang them on the wall later.

Now, you're going to cut out petals. And some more petals. And more. And more. And more. You get where this is going, don't you?
For the biggest of my flowers, I initially cut two petals each from every paper because I had two large flowers to make. After a bit of experimenting, I can tell you that you should probably only try to cut through two sheets at a time unless you don't mind touching up the edges later. The outer perimeter of petals should be roughly the length of the cardboard center.
 |
| My intrepid assistant |
If you're going with #1, skip this next part and go straight to gluing the petals down. If you're going with #2, read on.
So, #2-ers, take your petals and make a small fold on both sides at the bottom of the petal. If you look at the picture above this, you'll see how I folded the sides in just a little. Now, glue them down. Do this for all of your petals.
 |

Take out that special sheet of yellow paper and cut out a circle big enough to cover the center of the flower and the folds in the petals. Fold that circle into 8ths and then unfold it. Put a dab of hot glue in the center on the back and glue it down. Cut out another circle that's smaller than the original center circle and fold that into 4ths. Pinch the sides of the circle while folded in half and bring those pinches together. This is like folding it into 8ths, but there won't be any crisp folds. Put a dap of glue on the center on the back and glue it down onto the center of the previous yellow circle.

I used several petal variations in this project. In the smallest of the flowers, the petals are heart shaped and are of the #1 (non folded and glued) variety. The second large flower has two points per petal and there are three center circles (the largest of the 3 center circles was cut into a sunburst shape). The three medium flowers are all different: one has finger-like petals, one has rounded tip petals, and the third has petals like a pansy. The possibilities are endless.
I hope you give this a try. It's time consuming, but very easy. My total cost for this project came out to about $5 (less if you consider I only used half of each sheet of paper) and you can't beat that with a stick, as my friend Katie is fond of saying. Send me pictures if you try it!

Friday, August 27, 2010


Tuesday, August 24, 2010
Missy Moo's Halloween Dress TUTORIAL - FAIL!!!
 |
| Blog deleting fairy? |
OH MY GOSHY GOSH GOSH.
I am out of words.
I do not know what just happened, but this thing just deleted two weeks of work. In the midst of me correcting some measurements for the bodice, everything just vanished. And, since when you're in Edit mode it automatically saves itself every couple seconds, it saved the blank screen before I could Undo it.
Please excuse this interlude: F***(!(U#IR()W&$()*&QU*EI*U*(REUQQQ*EU*%(U#%(*^*^(*^
I am insanely sorry, but I do not think I CAN retype and refigure all this out again without going INSANE. I didn't write any of it down - not a bit. It was all typed.
I think I hate you, BLOGGER.
On a different note, maybe this is a good thing. I was finding that some of my measurements were slightly off in vital spots and that I was having to improvise with my sample dress - which is really more the length of a tunic.
Ugh. Ugh. Ugh.
My mother's solution is to go drink some tea. I don't think so. Give me the hard stuff: milk and freshly baked chocolate chip cookies.
Ugh ugh ugh. Well, at least Missy Moo's dress is shaping up nicely even if you can't see the work in progress. Want a looksie into what you're not getting a tutorial on today? Okay. Here it is:
 |
| Full on ZOMBIE mode! |
FYI: I still need to hem the skirt and put some elastic in those sleeve-y bits. However, I can't convince her to take it off! She has been begging for this dress for two weeks and isn't about to give it back to me now.
I have saved all the pictures I took, so it's not inconceivable that one day I might get back the strength to retype all that was lost - perhaps a little closer to Halloween? Anyways, I'll leave you with these:


*sigh* I guess I'll go clean up my mess now. There's all kinds of cast off scraps everywhere and all they remind me of is failure - though, it wasn't REALLY my fault I don't think.
Early to bed is early to rise. Tomorrow will be another day. Let's hope my crafting mojo is back on track and that Blogger never, ever, EVER messes me up this epically again.
Goodnight.
Monday, August 23, 2010
Weekend Woes

Hello You Faithful Few,
Really, I should be in bed right now instead of chatting away like this. However, it occurs to me that you may have missed me. Don't worry - I missed you too.
Still, I am TIRED. So, I think this one is just gonna' be a pretty little photo montage of our weekend. Enjoy!
Day One in Columbia:
 |
| Missy Moo all proud on a big girl bike |
 |
| On the Venetian carousel |
 |
| After a trip to Sephora |
 |
| Taking a break, eating a pretzel |
Day Two in Columbia:
 |
| Cuddling with the Mad Hatter |
I'm just going to put this here: I can't seem to get the photos in any semblage of order and trying to fix them is just making me angry - so I'm not going to try anymore. THERE!
Goodnight everyone. Sorry I've not been around.
Oh? You want to know what time we got home? Well, we didn't leave the mall until it closed at 6. Yeah. It was a LOOOONG day.
 |
| Exploring Columbia |
 |
| At the waterfall/fountain |
 |
| What are men compared to rocks and trees and nature? |
 |
| Super proud to be squashing 3 bears |
 |
| Milk? |
Friday, August 20, 2010
Heart Quilt
Hello,
I've been bad - very, very bad. Instead of working on the Halloween dress, I've been flirting with a new quilt. If it makes you feel any better, I'm pretty darn exhausted - mentally and physically.
It all began innocently enough. I was trolling around on One Pretty Thing and saw this oh so cute patchwork skirt at Moda Bake Shop (link here.) Then, I saw they've got their tutorials listed as "Recipes" to continue their bakery theme. So, I thought, "The skirt is cute. Let's look at their other stuff."
Oh, dear reader, this was my downfall. They have SO many amazing projects over at Moda Bake Shop! If you'd like to take a looksie, click here. But, beware. You will want to make everything they offer and you will have trouble going to bed because you'll still be thinking of their amazingness!
So, after having an exceptionally lovely afternoon with some buddies, where we talked about an upcoming possible quilt, I thought to myself, "Look at their quilts! Go on!"
I instantly fell in love with this one. Go on. Click on the link. It won't hurt you...much.
Yes, isn't it beautiful? That quilt prompted this mess:

Please ignore the glaring highlighter yellow! I promise that's not what it'll look like once done. That stupid grid gave me indigestion! I had to draw it twice and I still didn't get it right! Ugh. (The green sashing section isn't the proportional size. LOL.) (I don't know why I'm laughing. It isn't funny...)
Anyways, the finished quilt will be 37 inches x 49 inches - as that is the size of the blanket I will be re-covering. I love re-covering blankets because the new version incorporates all that came before it and nothing is lost or trashed. It's just a good old recycling!
It will have a 3 inch border all around with appliqued heart squares in the corners and in the rows. The rows will be approximately 7 inches x 31 inches and the sashing will be patchworked pieces 2 inches x 31 inches. See?

Perhaps this quilt can be my very first quilt along! You like that? Me too. We'll keep in touch about this. After all, I can't just let the last 3 hours of my life that it took to draw this up and figure out the measurements and then to blog about it go to waste!
I've been bad - very, very bad. Instead of working on the Halloween dress, I've been flirting with a new quilt. If it makes you feel any better, I'm pretty darn exhausted - mentally and physically.
It all began innocently enough. I was trolling around on One Pretty Thing and saw this oh so cute patchwork skirt at Moda Bake Shop (link here.) Then, I saw they've got their tutorials listed as "Recipes" to continue their bakery theme. So, I thought, "The skirt is cute. Let's look at their other stuff."
Oh, dear reader, this was my downfall. They have SO many amazing projects over at Moda Bake Shop! If you'd like to take a looksie, click here. But, beware. You will want to make everything they offer and you will have trouble going to bed because you'll still be thinking of their amazingness!
So, after having an exceptionally lovely afternoon with some buddies, where we talked about an upcoming possible quilt, I thought to myself, "Look at their quilts! Go on!"
I instantly fell in love with this one. Go on. Click on the link. It won't hurt you...much.
Yes, isn't it beautiful? That quilt prompted this mess:

Please ignore the glaring highlighter yellow! I promise that's not what it'll look like once done. That stupid grid gave me indigestion! I had to draw it twice and I still didn't get it right! Ugh. (The green sashing section isn't the proportional size. LOL.) (I don't know why I'm laughing. It isn't funny...)
Anyways, the finished quilt will be 37 inches x 49 inches - as that is the size of the blanket I will be re-covering. I love re-covering blankets because the new version incorporates all that came before it and nothing is lost or trashed. It's just a good old recycling!
It will have a 3 inch border all around with appliqued heart squares in the corners and in the rows. The rows will be approximately 7 inches x 31 inches and the sashing will be patchworked pieces 2 inches x 31 inches. See?

Well, it'll have to wait though. I've still got that dress tute to finish. I wonder why I'm dragging my heels on that. You want to know too? Well, if you figure it out, let me know because I certainly don't know.
Perhaps this quilt can be my very first quilt along! You like that? Me too. We'll keep in touch about this. After all, I can't just let the last 3 hours of my life that it took to draw this up and figure out the measurements and then to blog about it go to waste!
Missy Moo's First Hair Cut

She just asked me, "Where's my hair? Has it gone somewhere?"
Um, yeah! OFF YOUR HEAD!!!
There was absolutely NO way I could untangle the mini dreads. So, out came the kitchen shears. Ugh ugh ugh.
Please enjoy this visual interlude...

 |
| Amazing bubbles my ass! |

 |
| Oh well. At least we have chocolate cake and peaches. And, you can't really tell. Can you? |
Thursday, August 19, 2010
How to Appliqué
Hey Guys,
In preparation for the Missy Moo Halloween Dress tutorial, I feel I need to do a little post on appliqué. So, let's go.
An appliqué is basically when you sew down a decorative piece of fabric over the top of another fabric. According to my dictionary, appliquéing is when you "sew or stick pieces of fabric onto a large piece of fabric to form pictures or patterns". Like I said.
To do this the easy peasy way, you're going to need some of this:

Heat n' Bond Lite. Make sure to grab the purple package - NOT the red one. The difference between the two is that you can sew through the purple one, but if you try to sew through the red one, you'll gum up your needle. You can get this at fabric stores in the notions section. I like to wait until I've got a 40% off coupon at JoAnn's and then I pick some up. It comes in 1 yd and 5.25 yd denominations. Since it's not like you're going to suddenly become appliqué crazy, the 1 yd package is probably all you'll need.
Now, you're also going to need two pieces of fabric - one you want the appliqué made out of and one to stick it on. I leave size and color up to you. Today I am going to make a cat.
 Draw your design on a piece of paper. Keep in mind that you should draw the inverse of what you want. If you want your cat to face left, draw it facing to the right so that when you get it on where it's going it'll be in the direction you want. (Sorry for the poor quality picture here.)
 Take your design and trace it onto your Heat n' Bond paper. Take a piece of the material you're making the appliqué from and cut out a piece roughly the same size as your piece of Heat n' Bond paper with design.

 Place your design on top of the WRONG side of the appliqué fabric and use your iron to bond them together, as per the instructions on the Heat n' Bond packaging. Let it cool and then cut your design out.
Remove the paper backing and place your cut out design, RIGHT side up, on the fabric you want the design on. Bond again, as per the instructions on the Heat n' Bond packaging. There you have it! Your design is now on your piece.
Now you need to go around the perimeter of your design and stitch it down with your sewing machine. You can choose to use a decorative stitch or a satin stitch. You could also choose to sew it down by hand. Once you're done with that, you're done with your appliqué. Congratulations!
(On a side note: If you'd gotten the RED package, you wouldn't have to sew it down because the bond the gookie-mookie makes is supposed to be super strong. However, I made some silhouettes with the red package a month or so ago and any pointy bits, like my brother's nose, just kept coming unstuck. Just something to keep in mind.)
CIAO!
In preparation for the Missy Moo Halloween Dress tutorial, I feel I need to do a little post on appliqué. So, let's go.
An appliqué is basically when you sew down a decorative piece of fabric over the top of another fabric. According to my dictionary, appliquéing is when you "sew or stick pieces of fabric onto a large piece of fabric to form pictures or patterns". Like I said.
To do this the easy peasy way, you're going to need some of this:

Heat n' Bond Lite. Make sure to grab the purple package - NOT the red one. The difference between the two is that you can sew through the purple one, but if you try to sew through the red one, you'll gum up your needle. You can get this at fabric stores in the notions section. I like to wait until I've got a 40% off coupon at JoAnn's and then I pick some up. It comes in 1 yd and 5.25 yd denominations. Since it's not like you're going to suddenly become appliqué crazy, the 1 yd package is probably all you'll need.
Now, you're also going to need two pieces of fabric - one you want the appliqué made out of and one to stick it on. I leave size and color up to you. Today I am going to make a cat.


 Place your design on top of the WRONG side of the appliqué fabric and use your iron to bond them together, as per the instructions on the Heat n' Bond packaging. Let it cool and then cut your design out.
Remove the paper backing and place your cut out design, RIGHT side up, on the fabric you want the design on. Bond again, as per the instructions on the Heat n' Bond packaging. There you have it! Your design is now on your piece.
Now you need to go around the perimeter of your design and stitch it down with your sewing machine. You can choose to use a decorative stitch or a satin stitch. You could also choose to sew it down by hand. Once you're done with that, you're done with your appliqué. Congratulations!
(On a side note: If you'd gotten the RED package, you wouldn't have to sew it down because the bond the gookie-mookie makes is supposed to be super strong. However, I made some silhouettes with the red package a month or so ago and any pointy bits, like my brother's nose, just kept coming unstuck. Just something to keep in mind.)
CIAO!
Confession Time
Okay, here it goes. Hi, my name is Jade and I HATE to prewash and iron my fabric.
There. I've said it. Now you know my deep dark sewing shame. And, now you know what's been taking so long with the Missy Moo Halloween Dress tutorial.
Oh, I've got it all typed out - really. All it's waiting for are the pictures and you can't take pictures unless your fabric is prepped and your fabric isn't prepped without being prewashed.
However, I bit the bullet last night and washed everything I need and now I've just got to cut and sew! So, I really don't want to be promising anything, but I feel okay with strongly hinting that the tute will be done by Monday evening.
In the meantime, please avail yourself of the applique tutorial that follows (or proceeds - as the case may be). Ciao!
Monday, August 16, 2010
Snoothy Time
Put several handfuls of ice, lots of fruit, some yogurt, and some milk in a blender. Then, you guessed it, BLEND!


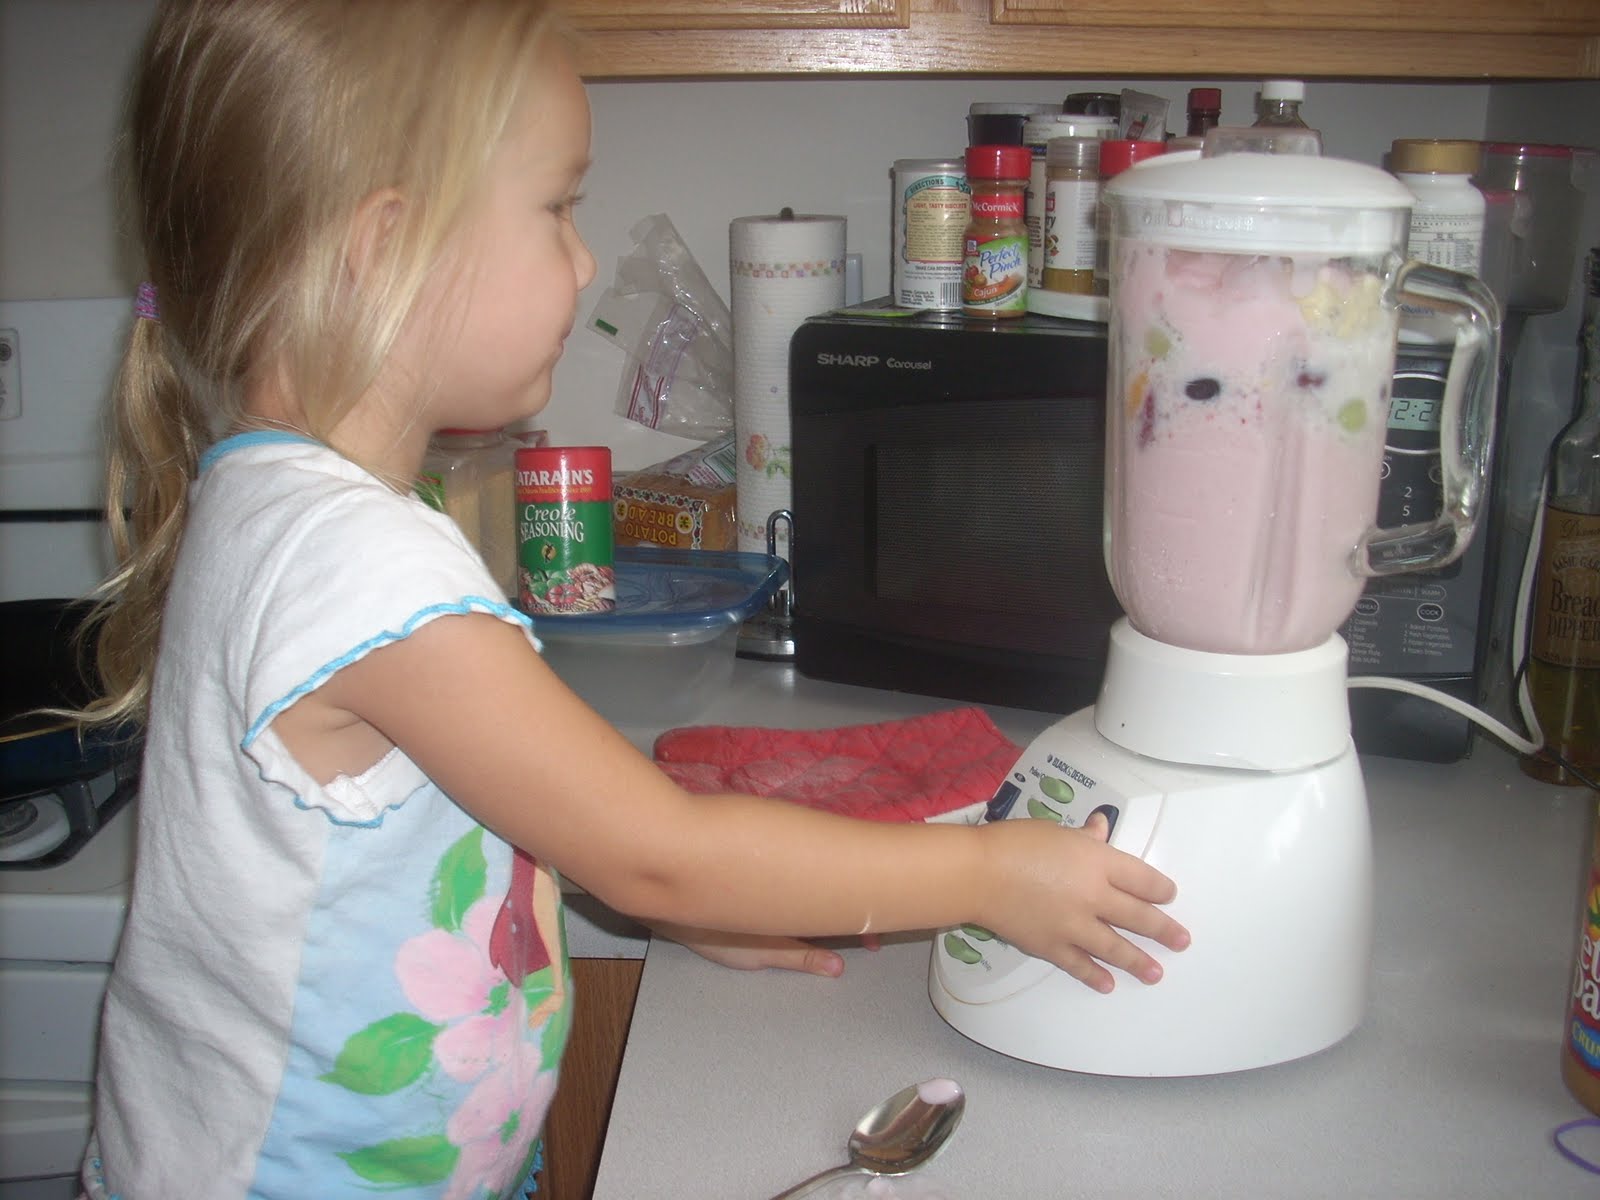


This is a wonderful way to get your kid busy in the kitchen, whipping up a healthy snack! Ciao.
Subscribe to:
Posts (Atom)