I've been pretty busy lately. However, that busy-ness hasn't translated over to the blog and I'm sorry about that. To make it up to you, how's about a tutorial? No? Hm... How's about several? Okay. I can do that.
First up: Let's finish hanging up those bats, shall we?
Take your sticky backed Velcro and cut out little squares. Attach a little square of Velcro, with both the hooks and loops together, to each of the wings and then stick to your house. Ta-da. All done.
I decided to cut out a free-hand spider which, as you can see, is munching on one of my bats. It shouldn't have flown in so close.
**************************
Second: Creepy black things that float in the wind - a.k.a. Witch's Curtain
| This comes from the Martha Stewart website. |
If you didn't know already, Martha Stewart's web page (this takes you straight to this year's templates) has just about everything her special $10 Halloween magazine has in it. So, save yourself some dough you could spend on outside decor and check it out.
Anyways, I was browsing around and stumbled across her Witch's Curtain. You take your basic black trash bag and cut it into strips. Then you tug on those strips and stretch them out. If you follow Martha's instructions, you end up with one curtain from one bag. I cut across the top and up the side slits and ended up with two. I guess it's a matter of taste. Anyways, be careful with your tugging since that plastic is really thin and easy to rip.
**************************
Third: What do you get with a disposable pie tin, a small branch, some white fabric, hot glue and a glue gun, and some needle and thread?
A GHOST!
Hot glue the fabric to the pie tin at the top of the head and to both of the arms. Thread your needle with about 2 feet of white thread and tie a knot in the end. Stitch through the fabric at the top of the ghost's head and pull the thread out til it's even with rest of the thread. Tie a knot and then snip off the needle. Put a knot in that end of the string and it's ready to hang.
Feel free to paint a face on your ghost. Eyes and a mouth seem to work out well. I used black acrylic craft paint. I can tell you from past experience, the paint will run if it isn't allowed to dry a day or two, so keep that in mind when you're putting them outside.
**************************
So, yeah. That's all I've got for you tonight. Here's some pictures showing what we've been up to lately.
I made these last night. I used one very large box and cut it in half. I didn't take any pictures of my process, so I'm not including it as a tutorial. However, I am certain you can easily figure these out.
Here is Mr. Bottle Bones:
He's pretty cool, even if I do say so myself. Here's the link to Disney Family Fun and his instructions. They say you'll need 8 or 9 milk jugs. I used 6 since I'm just that crafty. Oh yeah.
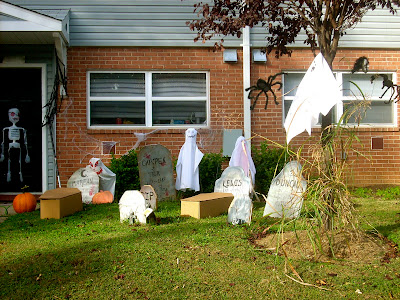
Here's the front of the house so far:
If I lose the yard decorating contest this year, it better be to someone that deserves it! The only things in this yard that weren't made by me are the chains on the fence by the witch, the red thing hanging by the door (it's a demon?), the shrunken head and spiders in the tree, and the pumpkins. Oh, and the cobwebs. So, yeah. I'd do a tute on the witch, but, again, I didn't take pictures of the process so you're out of luck. However, I am working on some last minute corpses for the tombs, so I'll try to remember to take pictures of that for you!
I leave you with my pretty lovie:
We imported those pretty leaves from a neighbor's yard since we've only got a young Japanese cherry blossom in ours. Happy crafting!


No comments:
Post a Comment